 Lemon wiki
Arranger
The arranger is where patterns, audio and automation become a song. Clips sit on tracks along a timeline in bars. Press F5 to show or hide it.
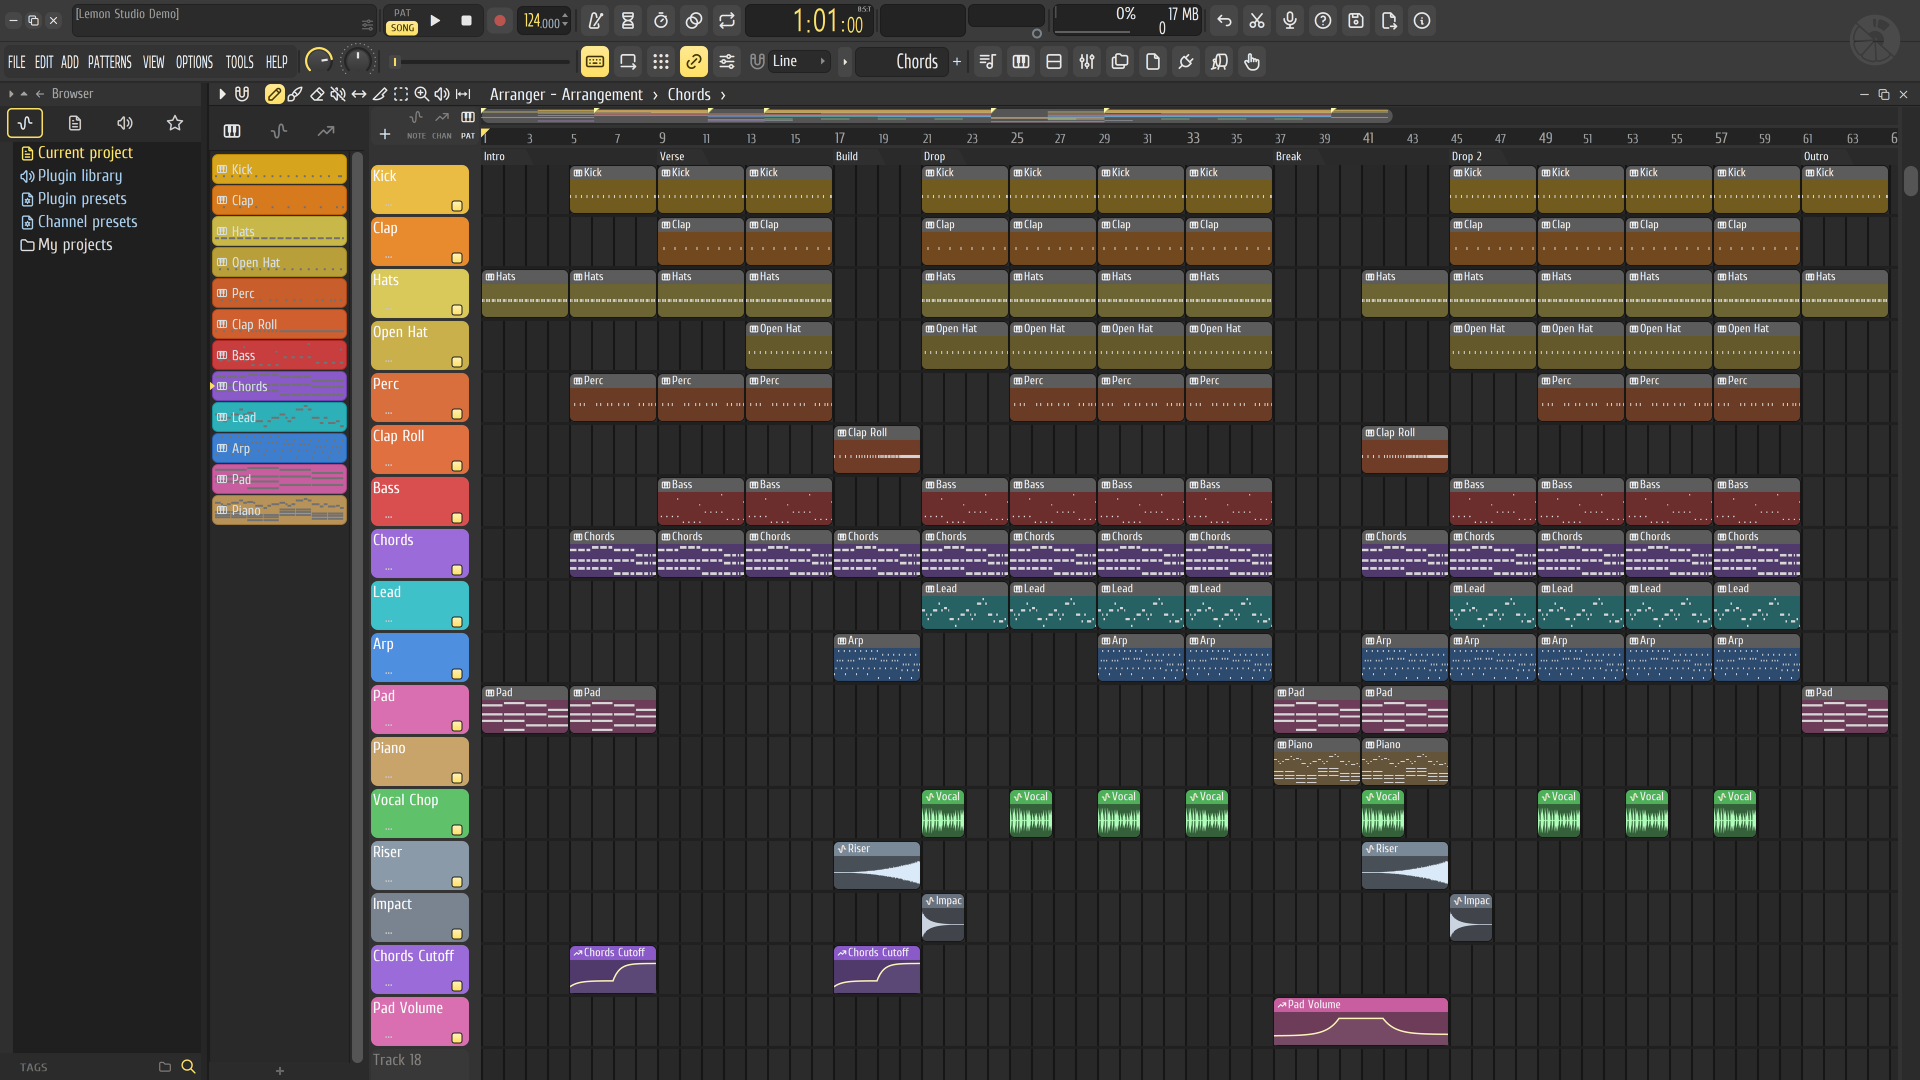
Make a song
Section titled “Make a song”- Pick a pattern in the list at the left. Its name appears in the title bar: it’s now the current clip.
- With the Draw tool, click a track to place it. Drag a clip to move it, drag an edge to resize it, and right-click to delete it.
- Switch the Paint tool on (B) and drag along a track to lay down copies.
- Set the toolbar’s switch to SONG and press Space. A click in the ruler also moves the song position and switches to SONG.
PAT plays the current pattern on its own and SONG plays the arranger. L flips between them while the computer keyboard isn’t playing notes.
Pick a clip
Section titled “Pick a clip”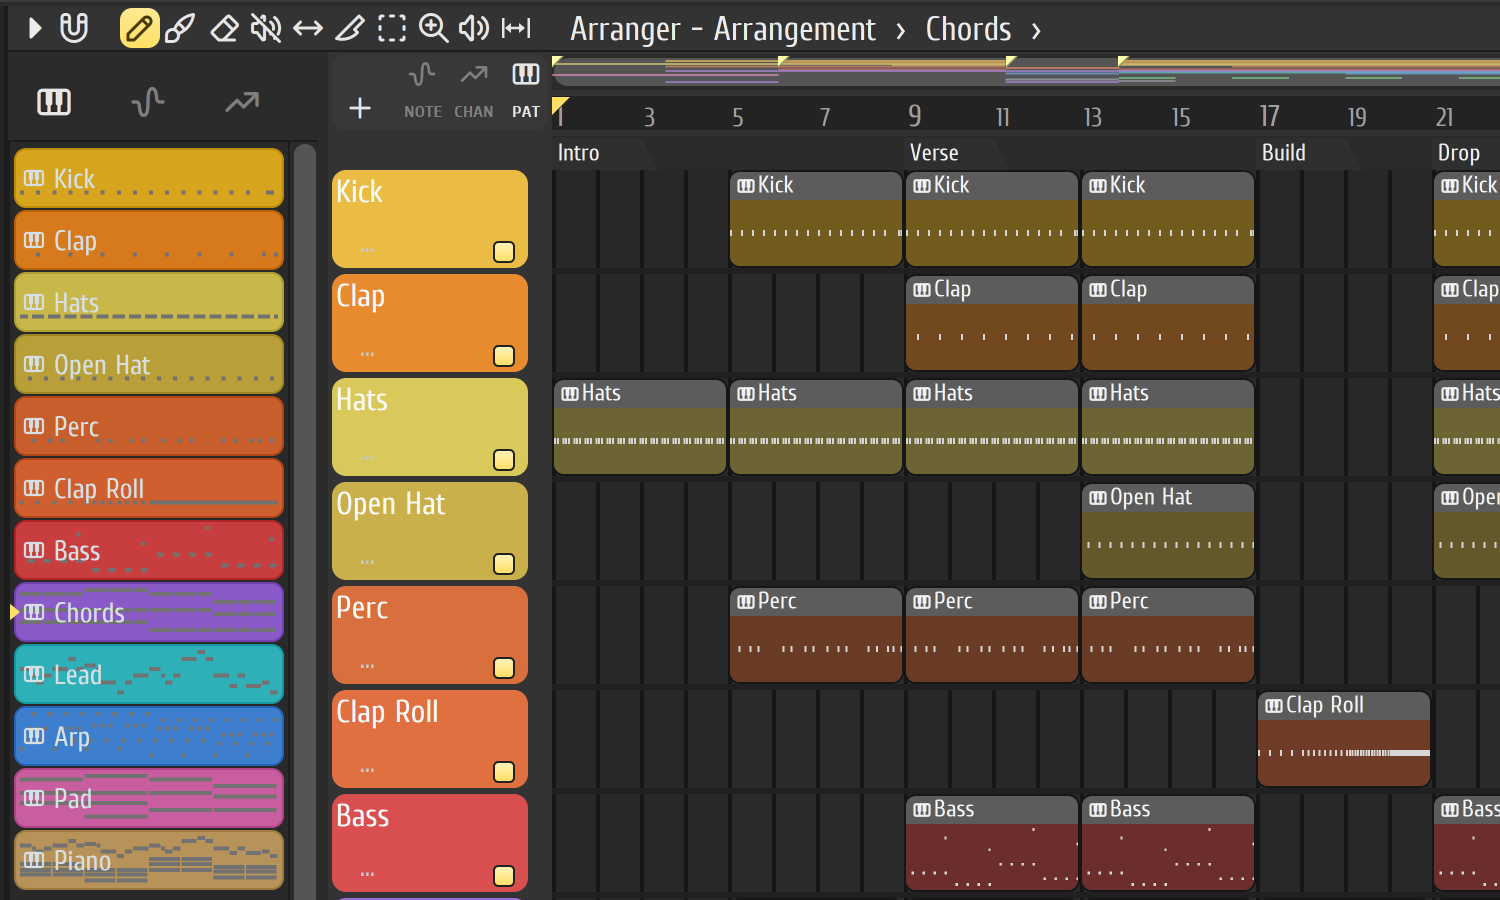
The list has three tabs: patterns, audio clips and automation clips. Click an item to make it the current clip, and right-click it for its menu. The + under the list makes a new pattern. Right-drag the list’s scroll bar to make the items taller, with a preview of what’s in them.
Ctrl+F8 opens the Clip palette, a quick menu of your patterns and instruments. Pick a pattern to make it current, or an instrument to open its window.
The three kinds of clip
Section titled “The three kinds of clip”- Pattern clips play a pattern. Change the pattern and every clip of it changes. Double-click one to edit it in the piano roll, and Make unique (Shift+Ctrl+C) gives a clip its own copy.
- Audio clips play a sample. Drag one in from the browser or your file manager, and double-click it to open its settings. Hover over it for fade handles at the top corners and a gain handle at the bottom. Overlapping clips on a track crossfade while Automatic crossfades is on in the project’s settings.
- Automation clips move a control over time. See Automation.
The tools
Section titled “The tools”| Tool | Key | What it does |
|---|---|---|
| Draw | P | Click to place, drag to move, edges resize, right-click to delete |
| Paint | B | Drag to paint clips along the track |
| Delete | D | Click or drag to delete |
| Mute | T | Click or drag to mute and unmute |
| Slip | S | Drag to move a clip’s content inside it |
| Slice | C | Drag a line to cut clips |
| Select | E | Drag a box. Ctrl adds to the selection |
| Zoom | Z | Drag a box to zoom. Right-click toggles |
| Playback | Y | Hold to play from the mouse |
Shift+drag copies a clip, Alt ignores the snap, and Ctrl+B duplicates the selection to the right. The magnet button sets the snap. The button after the tools is stretch mode: see Time-stretching.
Tracks and groups
Section titled “Tracks and groups”- Click a track’s small switch to mute it, and right-click or Ctrl+click it to solo.
- Double-click a name to rename the track. Shift+wheel moves it, and Alt+wheel changes the height of every track.
- Right-click a track for its menu. Group with above track folds tracks together, and Collapse group shrinks them to thin strips.
- Track mode links a track to the mixer. On an Audio track, audio clips play through its mixer track and recordings land on it. An Instrument track belongs to one instrument and takes no audio clips.
- TOOLS ▸ Lock all tracks to their clips ties each track that holds just one kind of clip to that clip, so Draw and Paint place it there whatever’s selected in the list.
To group clips, select them and press Shift+G, and Alt+G ungroups them. Groups move together while OPTIONS ▸ Grouped clips move together is ticked.
Markers
Section titled “Markers”Press Alt+T, or right-click the row under the ruler, to add a marker. Click one to jump there, and drag it to move it. Right-click a marker to rename it, move a whole section left or right, or give it an Action:
- Start is where the song and its exports begin, and where the bars count from.
- Loop and Marker loop repeat a part of the song. Marker skip jumps to the next marker, and Marker pause pauses there.
- Time signature changes the signature. Start recording and Stop recording punch recording in and out in SONG mode.
The arranger’s menu (the arrow at the far left of the title bar) has more under Time markers, such as Place loop (Shift+T) and Add key marker. Quantize song jumps makes a click in the ruler wait for the next beat or bar.
Several arrangements
Section titled “Several arrangements”A project can hold more than one arrangement of the same patterns: a full version and a short edit, say. Click the arrangement’s name in the title bar to switch between them, or choose Add one…, Clone…, Rename…, Delete or Merge with….
Good to know
Section titled “Good to know”- Right-drag in the ruler to make a time selection. Playback loops it in SONG mode, and exports can use it.
- Consolidate arranger selection (Ctrl+Alt+C) in the menu’s Tools renders the selection to an audio clip on a new track.
- Dropping audio doesn’t change the switch. If you’re on PAT, you’ll hear the pattern, not the new clip.
Related
Section titled “Related”- Instrument rack
- Performance mode: launch clips live
- Exporting audio
- Your first song