 Lemon wiki
Smith
Smith builds each note from a stack of harmonics, the pure tones that add up to a sound. You shape how many there are, how they fade in and out, and which ones stand out. It suits glassy bells, plucks, organs and slowly changing pads. It’s built into Lemon Studio and also comes as a VST3 and CLAP plugin for other DAWs.
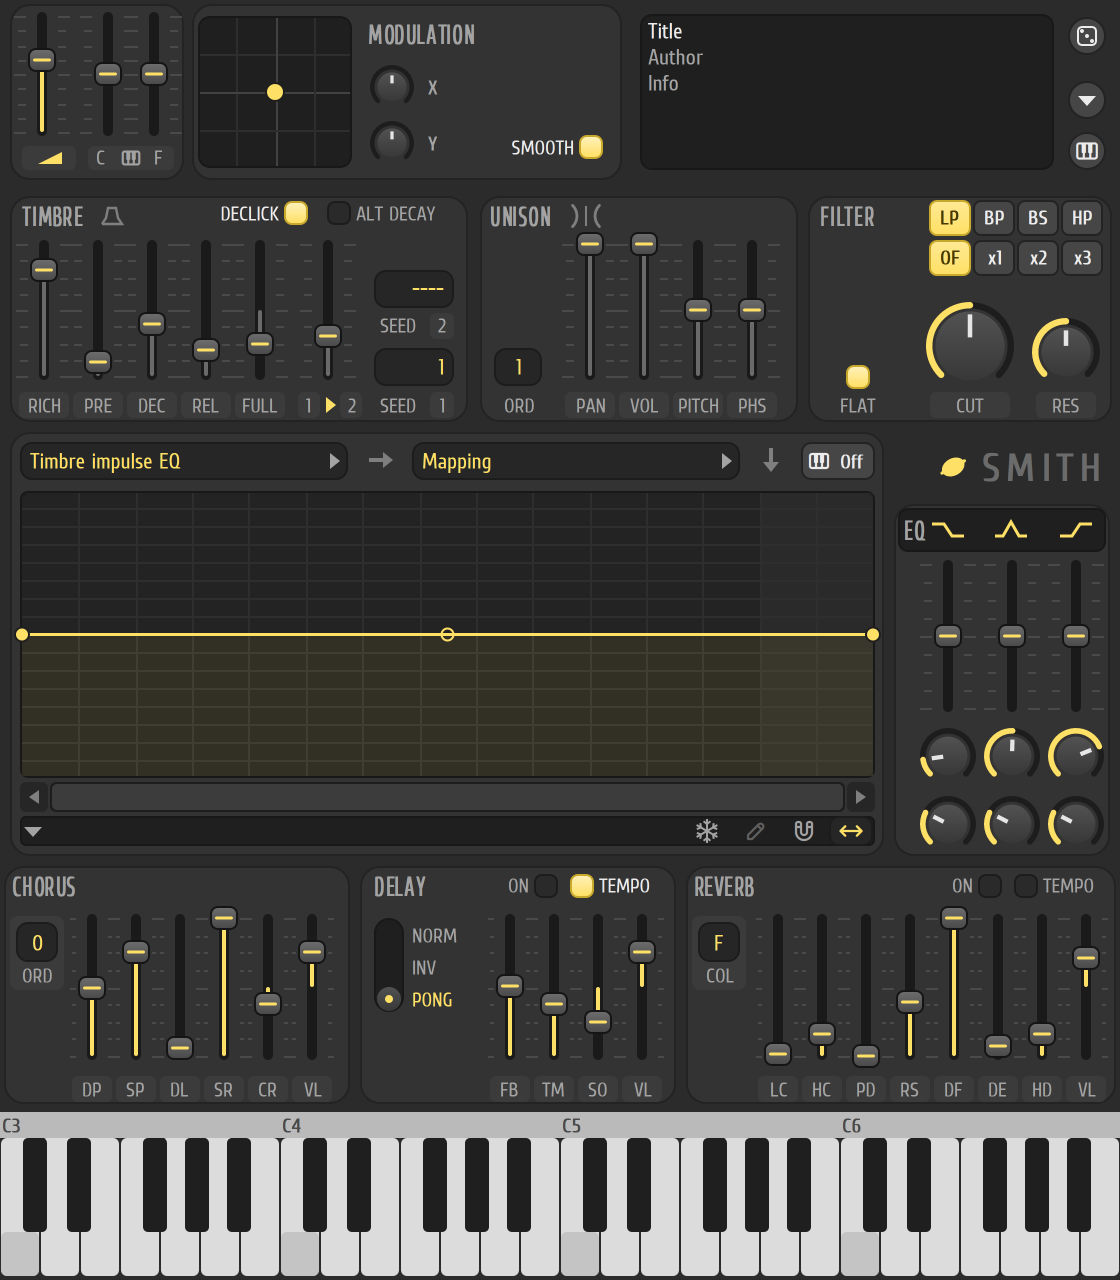
Get a sound quickly
Section titled “Get a sound quickly”- Add Smith from the ADD menu and click its name in the instrument rack.
- Play some notes with your computer keyboard, or use the testing keyboard that the third of the three round buttons at the top right shows.
- Click the first of those round buttons, or choose Generate random preset from the Options menu, to get a new sound. The same number always gives the same sound, and Enter random preset number… lets you go back to one you liked.
- Pull the RICH fader up for a brighter sound with more harmonics, or down for a duller one.
- Change DEC and REL to make the note ring longer or shorter.
What additive means
Section titled “What additive means”A plain wave such as a saw is a fixed pile of harmonics. Smith lets you decide the pile. Each harmonic gets its own level and its own decay, so the top of the sound can die away faster than the bottom, as in a struck bell or a plucked string.
The timbre card
Section titled “The timbre card”- RICH sets the richness of the timbre, from 6 to 16. Higher values pack in more harmonics.
- PRE, DEC and REL set the pre-decay, decay time and release time of the harmonics.
- FULL sets the fullness of the sound.
- The morph fader blends from the 1 seed pattern to the 2 one. The two SEED boxes choose the two random patterns it blends between.
- DECLICK avoids a click at the start of a note.
Maps and curves
Section titled “Maps and curves”Under the cards is a curve editor. Its target menu chooses what the curve shapes:
- Volume, Filter frequency, Filter resonance, Pitch, Unison pitch and Unison phase each have an envelope, an LFO and maps from the key, velocity, Mod A and Mod B.
- The timbre targets (pre-decay, decay time, release time, fullness, morphing, rotation, EQ shifting and forced harmonics) are maps drawn across the harmonics, so you can treat low and high harmonics differently.
- Timbre impulse EQ, decay EQ and release EQ are three more maps that lift or cut harmonics at the start, the decay and the release of a note.
Click in a curve to add a point and drag it. Right-click a point for its mode and to type in a value.
Unison, filter and effects
Section titled “Unison, filter and effects”- UNISON stacks several copies of the sound, with their own pan, volume, pitch and phase spread.
- FILTER has low, band, band-stop and high modes, off or one to three stages, and CUT and RES.
- CHORUS, DELAY and REVERB run along the bottom. The Options menu’s Effects entries set each one, and the unison, to its default or switch it off.
Good to know
Section titled “Good to know”- The Options menu also holds portamento, processing quality and Auto loudness.
- Greyed out in the Options menu for now: Resynthesis, and the Key and Velocity entries under Tone.
- The curve editor doesn’t zoom or scroll, and step editing does nothing yet.
Related
Section titled “Related”- Instrument rack
- Piano roll
- Citrus, for modulation-based synthesis
- Lemon Trio, for simpler sounds