 Lemon wiki
Lemon Reverb
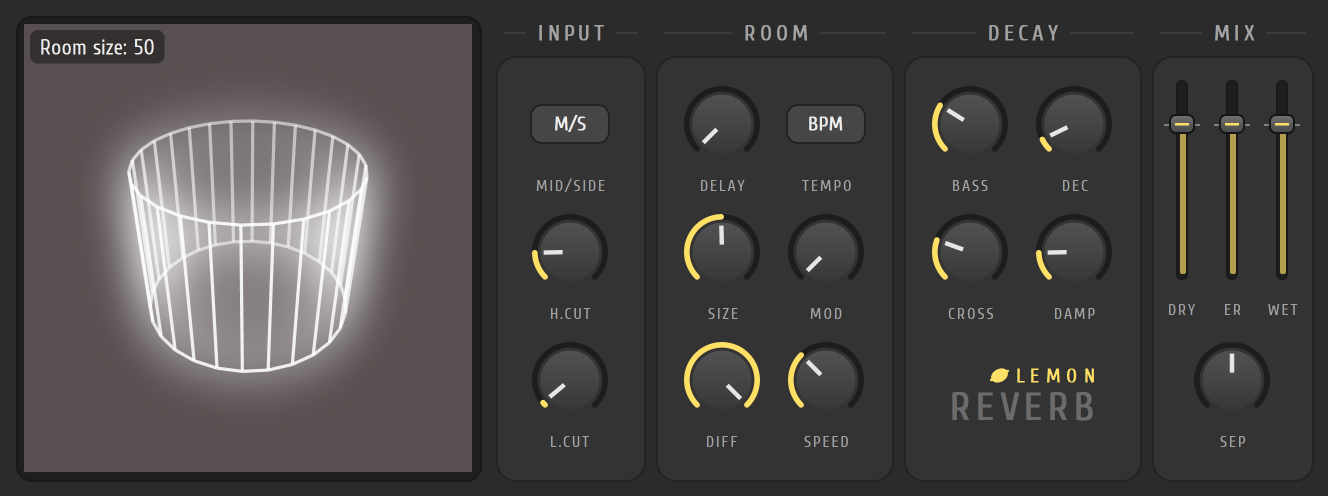
Lemon Reverb puts a sound in a space, from a small room to a long hall. A picture of a turning room sits at the left of the window and changes as you shape the sound, so you can see what a knob does as well as hear it.
It’s built into Lemon Studio, and also comes as a VST3 and CLAP plugin for other DAWs.
Add a room
Section titled “Add a room”- Put Lemon Reverb in an effect slot on a mixer track, or on a track you use as a send for several sounds.
- Set SIZE for the space: low for a room, high for a hall.
- Set DEC, the decay time. Longer values leave a longer tail.
- Bring the WET fader up until you hear the room, and lower DRY if the track should sit further back.
- If the tail is too bright or too boomy, lower DAMP to darken it or BASS to thin the lows.
The room view
Section titled “The room view”The room is drawn as a turning prism. DIFF (diffusion) changes how many sides it has, SIZE changes its shape and how high you see it from, and the WET level makes it glow. Its tint follows the filters, the decay, the damping and the bass.
The cards
Section titled “The cards”| Card | Controls |
|---|---|
| INPUT | M/S switches to mid and side processing. H.CUT and L.CUT filter the sound before it reaches the reverb |
| ROOM | DELAY is the pre-delay before the reverb starts. The BPM switch makes it follow the project tempo. SIZE, DIFF, and MOD with SPEED (gentle movement in the tail: how much, and how fast) |
| DECAY | BASS scales the decay of the lows, DEC is the decay time, CROSS is where the lows end and DAMP darkens the highs as the tail fades |
| MIX | Faders for DRY, ER (the early reflections) and WET, and SEP, which narrows or widens the stereo spread |
- Use a short pre-delay (20 to 40 ms) on vocals to keep the words clear in front of the reverb.
- Raise L.CUT to keep low notes from clouding the tail.
- Put one reverb on a send and route many tracks to it, to save effort and keep the mix glued together.
Related
Section titled “Related”- Mixer
- Lemon Delay
- Lemon Parametric EQ
- Automation, to open the reverb up for a chorus
- Plugins